An insulated siding installation guide provides the critical framework for modernizing a home’s exterior while significantly enhancing its thermal performance. This process involves more than just attaching panels to a wall; it requires a sophisticated understanding of building science and moisture management. As energy costs rise and climate volatility increases, homeowners and professionals are prioritizing high-performance cladding systems that offer both durability and aesthetic appeal.
Modern siding technology has transitioned from simple cosmetic coverings to integrated thermal systems. This shift reflects a broader movement in the construction industry toward holistic energy efficiency and sustainable building practices. For professionals, mastering these installation techniques is no longer optional but a baseline requirement for high-end residential projects. This guide explores the intricate details of executing a flawless installation in the luxury vinyl sector.
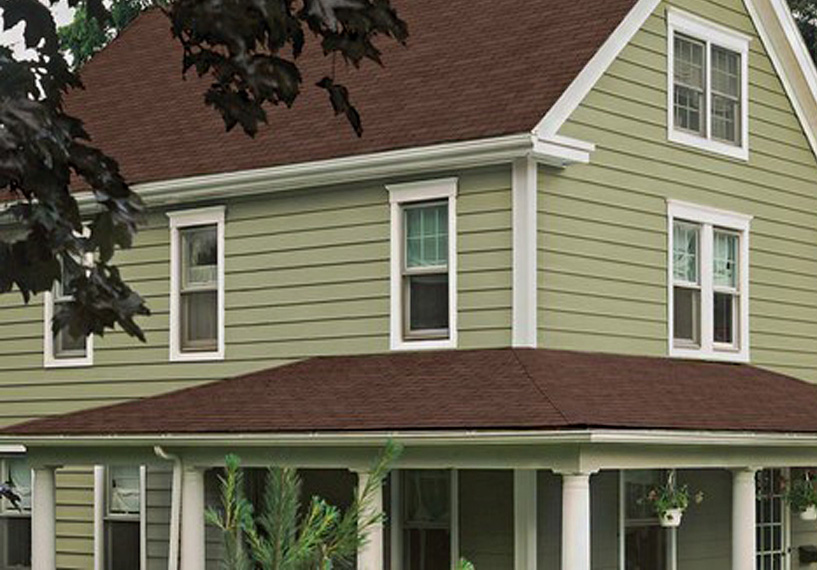
Implementing a professional strategy involves balancing architectural beauty with technical precision. By following a structured approach, builders can ensure that the home remains protected against the elements while reducing the strain on HVAC systems. Whether you are a seasoned contractor or a homeowner seeking technical clarity, understanding the nuances of these systems is the first step toward long-term structural integrity.
Insulated Siding Installation Guide
The core essence of an insulated siding installation guide lies in the creation of a continuous thermal envelope. To understand this concept, think of a home as a person standing in a cold wind. Standard siding acts like a thin windbreaker that stops the breeze but does little to retain body heat. Insulated siding, however, functions like a high-quality parka with integrated down filling, providing both a shield and a layer of warmth.
Common professional interpretations often focus solely on the R-value, yet the real value lies in the reduction of thermal bridging. Thermal bridging occurs when heat escapes through the wooden studs of a house, which typically have a lower insulating value than the surrounding cavities. By wrapping the entire exterior in a layer of contoured foam, you effectively “break” that thermal bridge, creating a more stable indoor climate.
Misunderstandings frequently arise regarding the breathability of these systems. Some assume that adding a thick layer of foam will trap moisture within the walls, leading to rot. In reality, modern systems are engineered with specific vapor permeance ratings to allow moisture to escape. This guide clarifies how proper installation maintains this balance, ensuring the wall assembly remains dry and functional for decades.
The Evolution Of Exterior Cladding Standards
The history of siding reflects a journey from raw natural materials to highly engineered synthetic composites. In the mid-20th century, hollow vinyl panels were introduced as a low-maintenance alternative to wood. However, these early versions lacked rigidity and offered zero insulating value. The industry eventually recognized that the “hollow” space behind the panel was a missed opportunity for energy conservation.
The development of contoured foam backings marked a significant technological shift. Manufacturers began bonding expanded polystyrene (EPS) directly to the vinyl skin. This innovation provided structural support to the panel, making it more resistant to impacts from hail or debris. It also addressed the “rattle” often associated with older vinyl products, providing a solid, high-end feel that rivals traditional wood or fiber cement.
Today, the standards for premium siding emphasize the synergy between the cladding and the underlying house wrap. We have moved past the “old way” of simply nailing panels over old wood. Modern standards require a comprehensive drainage plane and sophisticated flashing details. This evolutionary perspective highlights why a detailed insulated siding installation guide is essential for navigating the complexities of modern building codes and performance expectations.
Theoretical Foundations And Mental Models
To approach installation correctly, one must adopt specific mental models that prioritize the physics of the building envelope. The first model is the Continuity Principle. This framework suggests that any break in the insulation layer—no matter how small—significantly degrades the performance of the entire system. Installers must treat the siding as a seamless skin rather than a series of independent planks.
Another critical model is the Vapor Pressure Gradient. Professionals must understand that moisture moves from areas of high pressure to low pressure. In many climates, this means moisture moves from the warm interior toward the cold exterior. The cladding system must be designed to facilitate this movement rather than blocking it. Thinking about the “breathability” of the foam backing is essential for preventing interstitial condensation.
For laypeople, the “Rainscreen Mental Model” is the most helpful. This approach views the siding not as a waterproof seal, but as a primary water shedder. A small amount of water will inevitably get behind the siding. The goal of a professional installation is to provide a clear path for that water to drain down and out, rather than soaking into the sheathing. This logic helps prevent common errors in flashing and overlapping.
Taxonomy Of Insulated Siding Variations
The market offers several distinct types of insulated cladding, each with unique performance characteristics. Understanding the detailed taxonomy of these products is necessary for selecting the right material for a specific environment. The primary variations are defined by the type of foam used and how it is attached to the vinyl panel.
| Variation | Target Audience | Core Advantage | Trade-offs | Relative Complexity |
|---|---|---|---|---|
| EPS Contoured Foam | Standard Residential | Highly breathable and cost-effective | Lower R-value per inch | Moderate |
| Graphite Polystyrene (GPS) | High-Performance Builds | 20% better R-value than standard EPS | Higher material cost | High |
| Extruded Polystyrene (XPS) | Moisture-Prone Climates | Excellent water resistance | Lower vapor permeance | Advanced |
| Laminated Polyisocyanurate | Ultra-Luxury Projects | Highest R-value available | Can be brittle; requires precision | Very High |
When selecting a variation, the decision logic should be based on local climate data. For instance, in a humid coastal environment, the breathability of EPS might be prioritized over the absolute R-value of XPS. Conversely, in extreme northern climates, the thermal resistance of GPS or Polyisocyanurate becomes the primary driver for the investment. Selecting the right materials requires a deep understanding of how to compare premium vinyl cladding for long-term value.
Real-world Scenarios And Applied Logic
Consider a scenario involving the retrofit of a 1920s craftsman home. The existing wood siding is deteriorating, and the walls lack modern insulation. In this case, an insulated siding installation guide suggests a complete stripping of the old material to inspect the sheathing. The second-order consequence of choosing an integrated foam system here is the need for custom window casing extensions to accommodate the thicker profile of the new siding.
In a different scenario, a new construction project in a high-wind zone requires specialized fastening. The applied logic dictates that the foam must be factory-bonded to the panel to prevent the vinyl from rattling or tearing away during a storm. The outcome of this decision is a quieter interior environment and a significantly higher wind load rating. Professionals must account for these environmental variables before the first nail is driven.
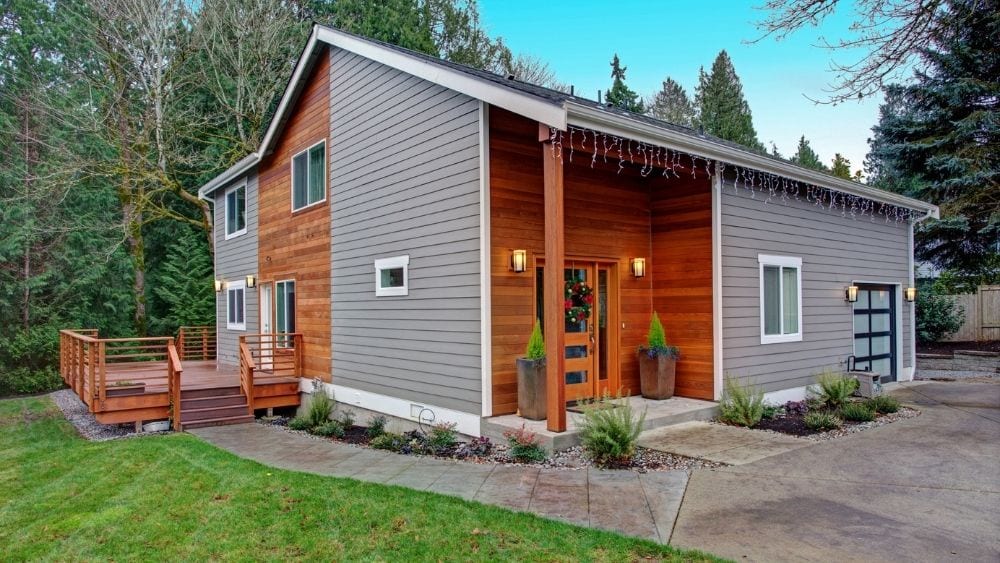
For modern architectural builds, the focus shifts to clean lines and flat surfaces. Architects often look for the best luxury vinyl siding for modern builds when energy efficiency is a top priority. In these cases, the installation logic must prioritize the precision of the corner posts and the alignment of the J-channels to maintain the minimalist aesthetic while still providing a robust thermal break.
Planning And Resource Dynamics
Financial planning for a siding project involves more than just comparing the price per square foot. Hidden costs often reside in the trim and accessory requirements. Because insulated panels are thicker than standard vinyl, they require specialized wide-face J-channels and corner posts. Failing to account for these “system accessories” can lead to budget overruns or a finished product that looks cluttered and poorly planned.
The reality check for any homeowner is that “cheap” installation labor often leads to “expensive” repairs later. If the panels are nailed too tightly, they will buckle as temperatures change. An insulated siding installation guide emphasizes that the foam backing adds rigidity, but the vinyl skin still needs to move. This dynamic requires a skilled installer who understands the specific tolerances of the material.
| Category | Entry-Level Scenario | Professional Standard | Enterprise/High-End | Key Nuance |
|---|---|---|---|---|
| Material Cost | $4 – $6 per sq ft | $7 – $10 per sq ft | $12+ per sq ft | Foam density drives price |
| Labor Expertise | General Handyman | Certified Siding Specialist | Building Science Consultant | Tolerance precision is key |
| Timeline | 5 – 7 Days | 10 – 14 Days | 3 – 4 Weeks | Detailing takes time |
The Professional Toolkit And System Integration
Successful installation depends on using tools designed for the added bulk of the insulation. Traditional vinyl snips may crush the foam, leading to unsightly gaps or compromised edges. Professionals use specialized circular saw blades with a high tooth count, often installed in reverse, to create clean, burr-free cuts through both the vinyl and the foam. This ensures that the panels butt together tightly at joints.
The real problem these tools solve is the maintenance of the panel’s geometry. If the foam is compressed during the cutting or fastening process, it creates a “valley” in the siding that will be visible under certain lighting conditions. Furthermore, the use of a power nailer must be calibrated perfectly; the nail head must remain slightly proud of the nailing hem to allow for the thermal movement of the panel.
Integration into the larger home ecosystem is the final step. The siding must work in tandem with the soffits, fascia, and gutter systems to ensure total water management. If the siding is installed without considering the gutter downspout locations, water may be directed behind the foam at the transition points. Professionals view the siding as one component of a larger “Exterior Management System.”
Risk Taxonomy And Failure Modes
Failure in siding installation usually begins with a small oversight in moisture management. The most common risk is “reverse flashing,” where the house wrap or flashing is tucked under the layer below it rather than over it. This error directs water behind the insulation, where it can sit against the wooden sheathing. Over time, this leads to structural rot that is hidden from view until the damage is extensive.
Another failure mode involves the mechanical fastening of the panels. Mastering these techniques helps installers learn how to manage siding expansion and contraction in fluctuating climates. If a panel is pinned too tightly, the thermal force will cause the vinyl to warp or “oil-can.” This not only ruins the aesthetic but can also pull the foam backing away from the vinyl skin, destroying the panel’s integrity.
Human error often occurs during the “detailing” phase around windows and doors. These are the most vulnerable points for air infiltration and water entry. A comprehensive insulated siding installation guide mandates the use of high-quality flexible flashing tapes at these junctions. Without these, the energy savings gained from the insulation are lost through air leaks at the apertures.
Governance And Long-term Maintenance
Static systems eventually fail if they are not monitored. A home’s exterior is a dynamic environment subject to UV radiation, wind loads, and temperature swings. Long-term mastery of a siding system requires a governance plan—a set of scheduled reviews to ensure that the drainage planes remain clear and the caulking at transition points remains pliable.
Documentation is a vital part of this governance. A professional installer should provide a “as-built” document showing the types of flashing used and the specific R-value of the installed system. This record becomes invaluable for future repairs or when the home is eventually sold. Sustainability is achieved not just through the materials used, but through the preservation of those materials over the life of the building.
- Annual inspection of J-channels for debris or blockage.
- Biannual cleaning with low-pressure water and mild soap.
- Check for loose panels or disconnected locking mechanisms after major storms.
- Inspection of sealant beads around windows and door penetrations every three years.
- Monitoring of interior humidity levels as a signal of exterior envelope performance.
Measurement And Evaluation Of Success
How do you prove that an installation was successful? For a layperson, the primary indicator is often the visual appeal—straight lines and clean corners. However, a professional uses qualitative indicators such as “Leading Indicators” and “Lagging Indicators.” A leading indicator might be the air-tightness of the house wrap before the siding is even applied, measured by a blower door test.
A lagging indicator is the reduction in energy consumption observed over the first full year after installation. Using thermal imaging cameras, a professional can provide a visual audit of the home’s exterior. If the installation was performed correctly, the images will show a consistent temperature across the walls, with no “heat leaks” at the studs. This comprehensive auditing protocol validates the investment and the skill of the installer.
Documentation of these successes should include a “before and after” energy profile. While external variables like weather patterns fluctuate, a professional can normalize the data to show the true efficiency gain. This data-driven approach moves the conversation from subjective “curb appeal” to objective “asset value,” which is crucial for high-end residential investments.
Common Misconceptions And Realities
One persistent myth is that insulated siding is too heavy for older homes. In reality, the foam backing is extremely lightweight Expanded Polystyrene, which adds negligible weight to the structure. Another misconception is that the foam will attract pests. Modern insulated siding products are treated with non-toxic additives, such as borates, which make the foam unappealing to termites and carpenter ants.
Some believe that any insulated siding installation guide can be applied to any climate. This is false; the “perm rating” or breathability of the system must be matched to the local environment. Using a low-perm insulation in a cold, damp climate without a proper interior vapor barrier can lead to moisture issues. The reality is that these systems are highly engineered and require site-specific adjustments.
Finally, there is a belief that insulated siding is a DIY project. While a talented hobbyist might manage a small shed, a full-home installation involves complex flashing and thermal expansion calculations that usually require professional training. The complexity of managing the “thick” profile around existing fixtures makes it one of the more challenging exterior upgrades.
Ethical And Practical Limits
There are certain scenarios where insulated siding may not be the optimal choice. In historic preservation districts, the added thickness of the foam can alter the home’s proportions, potentially clashing with strict aesthetic guidelines. In these cases, the trade-off between energy efficiency and historical accuracy becomes a significant gray area. Practical constraints, such as the location of existing gas lines or electrical meters, can also limit the feasibility of thicker cladding.
Furthermore, the environmental impact of the foam itself is a point of consideration. While the energy savings over 30 years are substantial, the manufacturing of polystyrene involves petroleum products. Ethical installers often weigh the long-term energy reduction against the initial carbon footprint of the material. This balance requires nuanced judgment rather than a one-size-fits-all directive.
Ultimately, the boundaries of this technology are defined by the quality of the substrate. If the underlying wood framing of a home is structurally compromised or rotting, installing new siding—no matter how well-insulated—is an exercise in futility. The system is only as strong as the wall it is attached to, making a thorough pre-installation inspection the most important ethical step in the process.
Conclusion: Synthesizing The Installation Logic
The success of a high-performance exterior depends on the synthesis of rigorous systemic processes and professional judgment. An insulated siding installation guide provides the technical steps, but the installer must apply those steps to the unique architecture of each home. By understanding the science of thermal bridging and moisture management, one can transform a simple cladding project into a permanent upgrade of the home’s value and comfort.
Ultimately, the goal is to create a building envelope that is resilient, efficient, and beautiful. This requires a commitment to using the right tools, following advanced frameworks, and maintaining a cycle of long-term governance. When executed with precision, insulated siding serves as a testament to the evolution of modern building standards, offering a sophisticated solution for the challenges of the current era. The balance between the physical components and the installation logic ensures that the home remains a high-performance sanctuary for decades to come.
Frequently Asked Questions
Does Insulated Siding Really Lower Energy Bills?
Yes, by providing a continuous layer of insulation over the wall studs, it reduces thermal bridging. This allows the home to retain heat in the winter and stay cooler in the summer, typically resulting in a noticeable reduction in HVAC usage.
Can I Install Insulated Siding Over My Old Wood Siding?
While it is possible in some cases, it is generally recommended to remove the old siding. This allows for an inspection of the sheathing and ensures that the new thermal envelope and house wrap are installed on a flat, stable, and rot-free surface.
How Does The Foam Backing Handle Moisture And Mold?
High-quality insulated siding is designed to be vapor-permeable, meaning it allows moisture to escape from the wall cavity. When installed with a proper drainage plane and house wrap, the system effectively manages moisture to prevent mold growth.
Is Insulated Siding More Expensive Than Regular Vinyl?
The initial material and labor costs are higher due to the foam backing and the specialized trim accessories required. However, many homeowners find that the long-term energy savings and increased durability provide a superior return on investment.
Will The Siding Buckle In Extreme Heat Or Cold?
As long as the panels are installed with the correct “floating” technique—where nails are not driven tight to the wall—the vinyl can expand and contract freely. Proper installation according to a professional guide prevents buckling and warping.